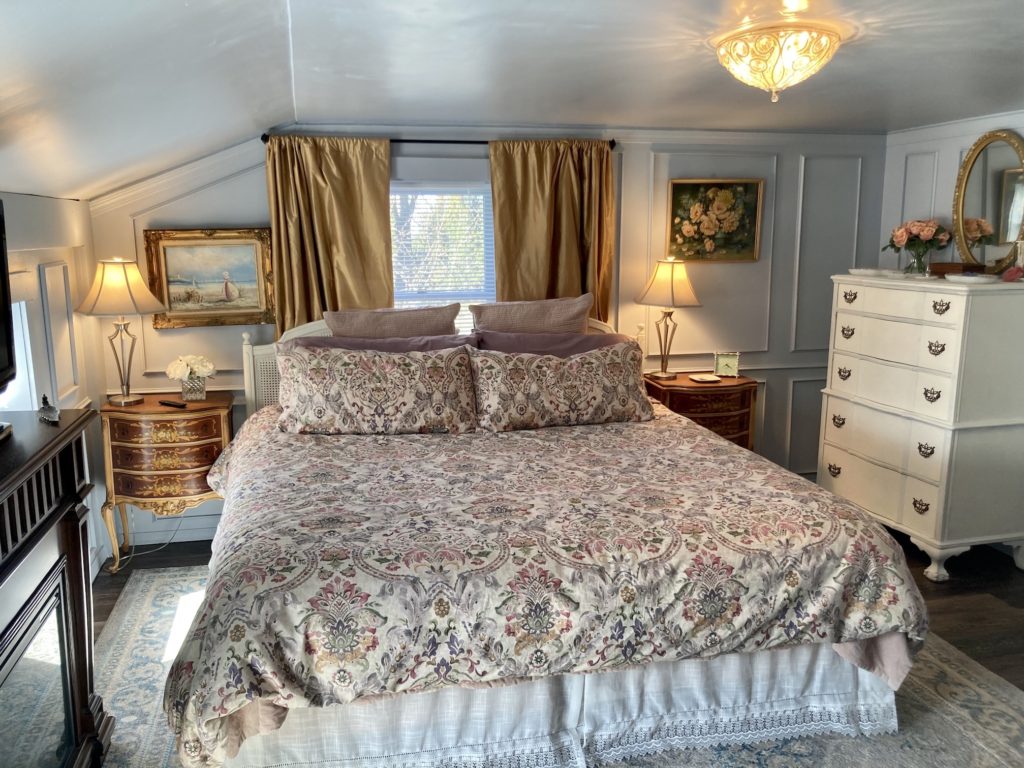
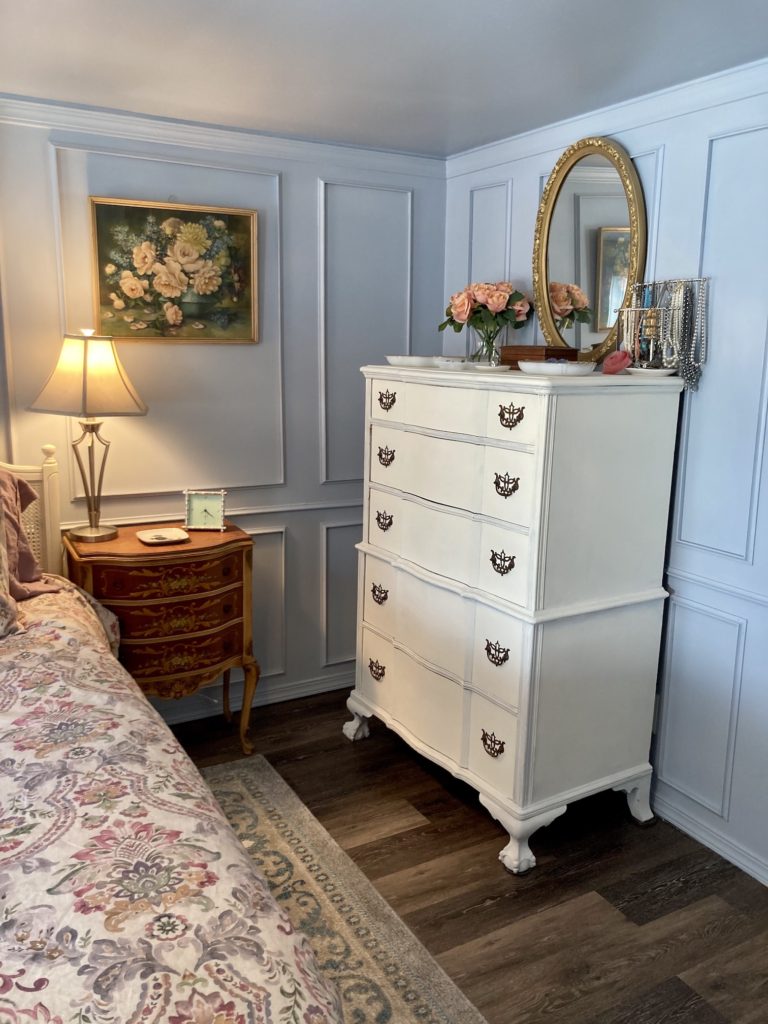
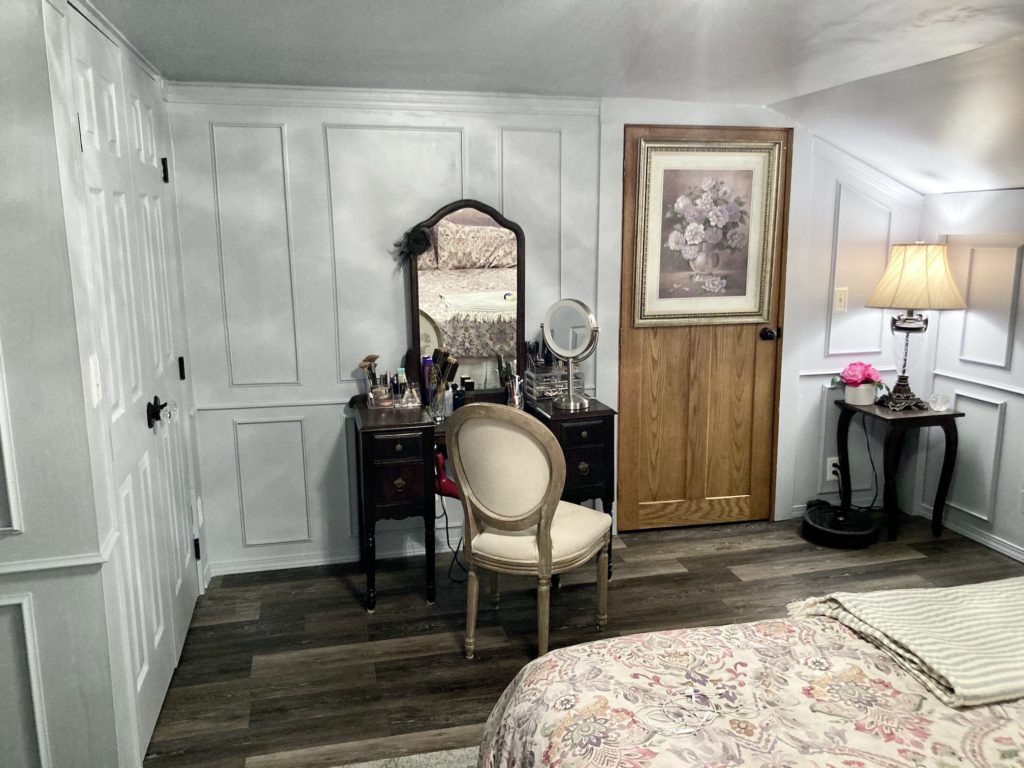
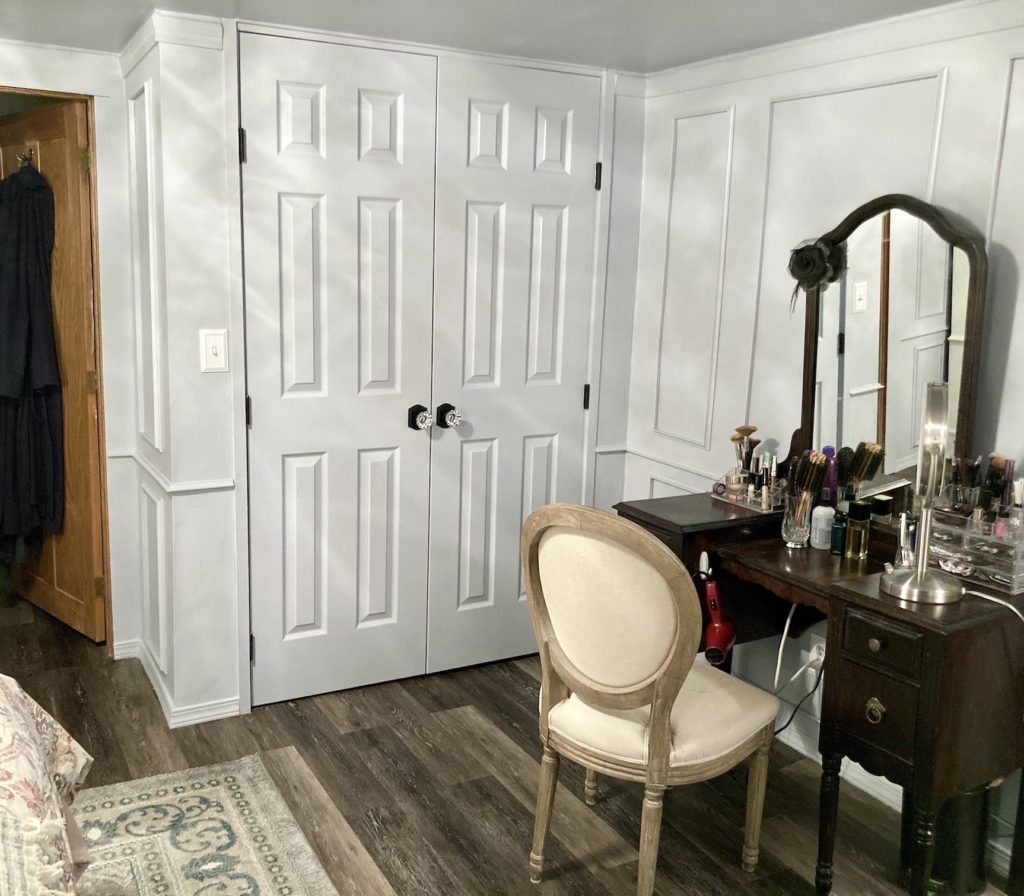
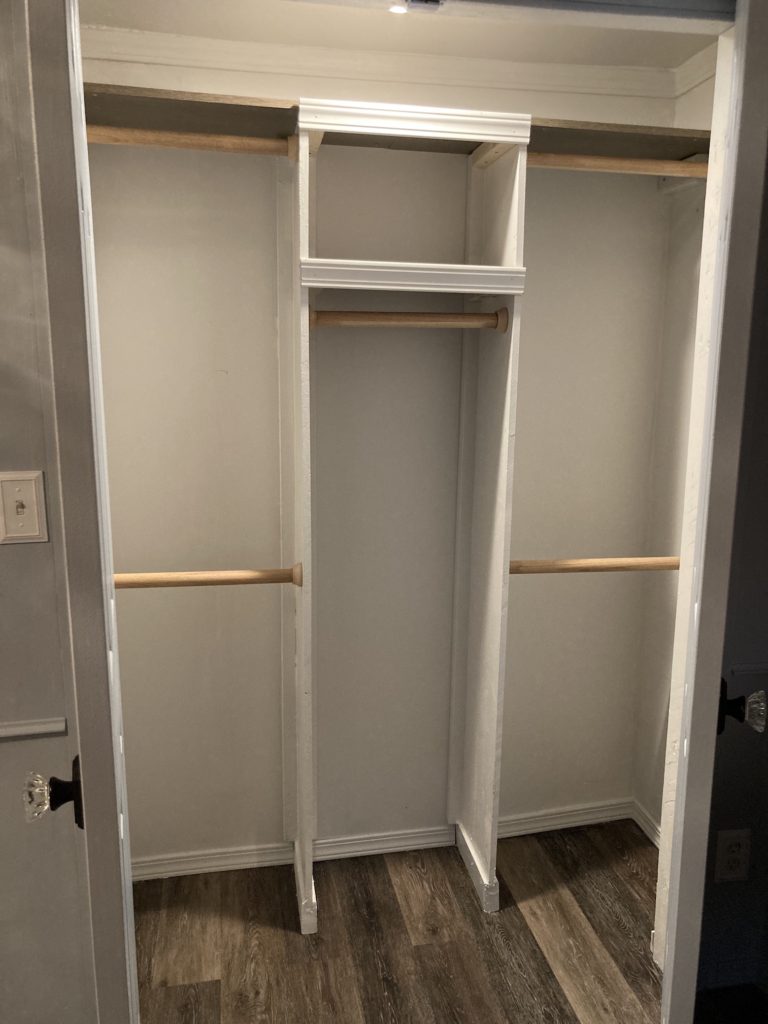
The Reveal: Primary Bedroom Transformation
The past decade’s home renovations have largely focused on the public parts of the house and, notwithstanding the primary bath, the upstairs remained largely untouched. It has been on our to-do list for a while now, but, atypically, I have been the one who was reluctant to get started because I knew it would mean living with several months of chaos and mess and I didn’t want to face it. Finally Bill convinced me that there would never be a better time than a pandemic winter to tackle a major indoor project and I conceded. All three of the upstairs bedrooms got new flooring and paint, but for our bedroom we went a little bit further with a huge closet renovation and the addition of picture frame molding on the walls. We’re also doing something really special with the landing at the top of the stairs, but that’s still a work in progress and I’ll cover it separately in a future post.
The primary bedroom has been 99% complete for a number of weeks now, but I was waiting on the arrival of the silk curtains I ordered before photographing it for the blog. Then when they finally arrived, we hung them and I didn’t like the way they looked, so we had to mess around with the width of the curtain rod a little bit. And then I waited a few days hoping that the wrinkles would hang out, which they decidedly did not. Eventually I accepted that I’d have to deal with them. First I tried very carefully steaming them in situ, despite the tag that explicitly said not to use a steamer. It didn’t do any damage, but it also didn’t remove any wrinkles, so finally I gave in and took them down to iron on the Silk/Wool setting. That took approximately 1,953 years, but in the end they’re the nicest curtains I’ve ever owned and they were worth the extra effort.
In a separate post, I will go into detail about how we hung the picture frame molding, where we sourced some of the materials and decor, and how I refinished some estate sale pieces to create a bedroom set that was cohesive but not too matchy-match. But for now, without further ado, here are the After pictures (you can see the Before pictures here):